

If you use a password manager, you already know how much trust you place in it. All of your logins, bank details, and private notes live there. In 2025, with data leaks and new security flaws showing up almost every month, it makes sense to keep that information under your own control. That’s where hosting Bitwarden yourself comes in.
When you self-host Bitwarden, you own everything – the database, the encryption keys, and the backups. No one else can peek in or change the rules. You don’t have to worry about price hikes or sudden policy changes from a provider. It’s just you and your server.
In this guide, we’ll walk you through setting up Bitwarden on a VPS using the latest software and best practices available right now. By the end, you’ll have a secure, fully working password manager that you control from top to bottom.
Prerequisites
VPS Specifications
Bitwarden’s own documentation mentions 1 vCPU and 2 GB RAM, but that’s only workable for a single user with no margin. For multiple users, database activity, and smooth updates, aim higher:
| Tier | CPU Cores | RAM | Storage | Best For |
|---|---|---|---|---|
| Entry Level | 2 | 4 GB | 40 GB NVMe | Personal vaults or small teams (up to ~5 users) |
| Recommended | 3 | 6 GB | 50 GB NVMe | Growing vaults, heavier sync traffic, future upgrades |
Virtarix’s S-Tier VPS plans are perfect for running Bitwarden with plenty of breathing room for future growth and updates, while still offering competitive pricing that undercuts many similar providers. The M-Tier plans add even more specs in case you plan to scale beyond a small team.
You can check out the current plans and pricing here.
Operating System & Access
- Ubuntu 22.04 LTS or 24.04 LTS, or Debian 12/13
- Root or sudo privileges
- Static IP address
Ubuntu 24.04 LTS is a smart pick because of the newer kernel, better hardware support, and updated tooling that keeps Docker and related services running cleanly for years.
Domain Configuration
You’ll also need a domain or subdomain that points to your VPS. Here’s how to set the DNS A record (replace with your actual values):
bitwarden.yourdomain.com A YOUR_VPS_IP_ADDRESS
This step ensures that when someone hits https://bitwarden.yourdomain.com, they land on your server, not someone else’s.
Required Software Versions for 2025
To avoid version conflicts or unknown bugs, use the following recent versions:
- Docker Engine: 25.x
- Docker Compose: v2.24+
- Bitwarden (unified deployment): Latest available
Yes, you will need all of these. Bitwarden itself runs in Docker containers, Docker Compose orchestrates them, Nginx will act as a reverse proxy, and Certbot handles SSL. Each plays a key role, so if you skip one, things can break.
Step 1: Preparing Your VPS Server
Alright, now that you’ve locked in a proper VPS and set up your domain, let’s get the server itself ready. These steps assume you have SSH access with a user who can run sudo. If you’re on Virtarix, you’ll already have a clean image to start with.
First, log in to your server using SSH:
ssh username@your_vps_ip
Once you’re in, update your entire system to the latest stable release. Keeping the OS fresh removes security holes and ensures you have the newest kernels and libraries:
sudo apt update && sudo apt upgrade -y
If you’re on Ubuntu, this will pull in all current packages. For Debian, the same command works with apt.
Now we’re going to create a dedicated system user for Bitwarden. This keeps the service isolated and is a small but important security step:
sudo adduser --system --group --home /opt/bitwarden bitwarden
We like keeping Bitwarden files under /opt/bitwarden because it’s clean and easy to maintain.
Next, install the base tools you’ll need for downloads, certificates, and configuration:
sudo apt install curl unzip ufw git ca-certificates -y
These give you curl (for fetching scripts), unzip (for compressed files), ufw (a simple firewall), git (to pull configs), and up-to-date certificates.
While you’re here, set up your firewall so only the right ports are open. Allow SSH, HTTP, and HTTPS, then enable UFW:
					sudo ufw allow OpenSSH
sudo ufw allow 80/tcp
sudo ufw allow 443/tcp
sudo ufw enable
We always recommend doing this before installing Docker so your server isn’t exposed unnecessarily. Finally, reboot your VPS to make sure all kernel updates are active:
sudo reboot
After it comes back online, reconnect with SSH and you’re ready to move on. At this point, your VPS is updated, secured with a firewall, and has a dedicated Bitwarden user, which is perfect groundwork for installing Docker and Docker Compose in the next step.
Step 2: Installing Docker and Docker Compose
Your VPS is ready. Now, let’s get Docker running so Bitwarden can live inside containers. Docker runs the services, and the Docker Compose plugin will manage them together.
First, log back into your server if you’re not already connected:
ssh username@your_vps_ip
Install Docker Engine
Update the package index and add Docker’s official repository:
					sudo apt update
sudo mkdir -m 0755 -p /etc/apt/keyrings
curl -fsSL https://download.docker.com/linux/$(. /etc/os-release && echo "$ID")/gpg \
  | sudo gpg --dearmor -o /etc/apt/keyrings/docker.gpg
echo "deb [arch=$(dpkg --print-architecture) signed-by=/etc/apt/keyrings/docker.gpg] \
https://download.docker.com/linux/$(. /etc/os-release && echo "$ID") \
$(lsb_release -cs) stable" | sudo tee /etc/apt/sources.list.d/docker.list > /dev/null
sudo apt update
sudo apt install docker-ce docker-ce-cli containerd.io docker-buildx-plugin docker-compose-plugin -y
This installs the latest stable Docker release from the official repository.
Start and Enable the Service
Make sure Docker starts now and on every reboot:
					sudo systemctl start docker
sudo systemctl enable docker
Add Bitwarden User to the Docker Group
Now give the bitwarden user permission to run Docker:
					sudo usermod -aG docker bitwarden
# Refresh group membership without logging out:
newgrp docker
Verify the Installation
Check if Docker and the Compose plugin are working:
					docker --version
docker compose version
You should see the current version numbers for both. Run a quick test container to confirm everything’s healthy:
sudo docker run hello-world
If you see a friendly message, Docker is set up correctly.
Step 3: Downloading and Setting Up Bitwarden
Now that Docker is up and running, let’s pull in the Bitwarden server stack and prep your vault. Before you start, there are a couple of must-have items and don’t skip these or the installation will fail.
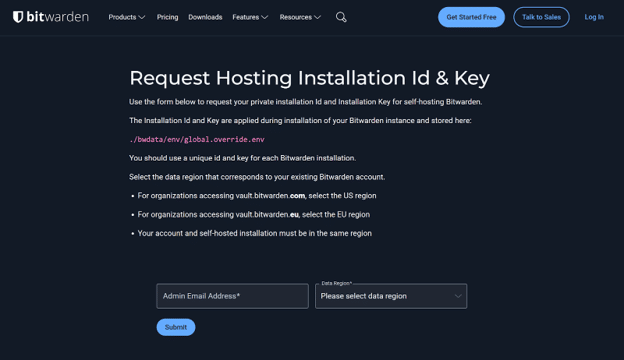
Get Your Bitwarden Self-Hosting Credentials
Bitwarden requires an Installation ID and Installation Key.
Here’s what to do first:
- Create a free Bitwarden account (if you don’t already have one).
- Visit https://bitwarden.com/host, log in, and register for self-hosting.
- Copy your Installation ID and Installation Key—you’ll need both during setup.
Keep these handy before you run anything.
Switch to the Bitwarden User
We created a dedicated bitwarden user back in Step 1 for security and clean file ownership.
Switch to it:
					sudo -iu bitwarden
# You’ll land directly in /opt/bitwarden (the user’s home)
pwd   # verify location
Download the Official Installer
Bitwarden now provides the latest installer at a new URL. Run the following to grab the newest stable release:
					curl -Lso bitwarden.sh "https://func.bitwarden.com/api/dl/?app=self-host&platform=linux"
ls -la bitwarden.sh   # quick check to confirm the script is here
chmod +x bitwarden.sh
Run the Setup Script
Start the installer:
./bitwarden.sh install
When prompted, provide:
- Domain name – e.g. vault.yourdomain.com
- Let’s Encrypt SSL – choose Y for a free TLS certificate
- Installation ID – from your Bitwarden host portal
- Installation Key – from the same portal
- Database option – press Enter to accept the default (built-in) unless you have a custom database
The script will automatically create the docker-compose.yml and all environment files under /opt/bitwarden.
That’s it for the setup stage. You now have the full Bitwarden server stack downloaded, configured, and ready to launch in the next step, where we’ll bring the containers online and secure your vault.
Step 4: Starting Bitwarden and Enabling HTTPS
Continuing as the bitwarden user in /opt/bitwarden, let’s bring your Bitwarden stack online and make sure HTTPS is working.
First, verify you’re in the right directory:
					pwd   # should show /opt/bitwarden
ls -la # confirm the bitwarden.sh script is here
Start the Bitwarden Stack
Run the installer wrapper to pull the latest container images and start all services:
./bitwarden.sh start
This will download and run all Bitwarden containers. Once it finishes, check the status of your containers:
docker ps --format "table {{.Names}}\t{{.Status}}"
Example of healthy container output:
					bitwarden-web        Up 2 minutes
bitwarden-api        Up 2 minutes
bitwarden-identity   Up 2 minutes
bitwarden-mssql      Up 2 minutes
Look for all containers showing Up (container names may vary slightly). Avoid any that say Restarting or Exited. This confirms the stack is running and healthy.
First-Time Setup and Admin Account
Before you can start using Bitwarden, you need to create your first admin account. Open a browser and visit:
# Visit: https://vault.yourdomain.com/admin
Follow the commands to create the admin account. After that, you can access your personal vault:
# Visit: https://vault.yourdomain.com
This step is crucial. Without it, your Bitwarden instance is running but unusable.
Viewing Logs and Troubleshooting
Bitwarden keeps logs in the main installation directory. You don’t need to switch directories unnecessarily; just run:
docker compose logs -f
Example of healthy logs:
					bitwarden-api      | [INFO] Server listening on port 443
bitwarden-web      | [INFO] Web server started
bitwarden-mssql    | [INFO] Database ready
Example of error logs:
					bitwarden-api      | [ERROR] Database connection failed
bitwarden-web      | [ERROR] SSL certificate not found
Stop following logs with Ctrl + C.
Firewall and Let’s Encrypt Validation
If you enabled Let’s Encrypt and chose “Y” during installation, certificates are requested automatically.
Common issues include:
- Port 80 blocked by firewall
- DNS is not fully propagated
- Domain typo during install
Check firewall status by switching back to your regular user:
					exit  # exit bitwarden user
sudo ufw status
Then switch back to the bitwarden user if needed:
sudo -iu bitwarden
Check which ports are listening:
sudo ss -tulpn | grep -E ':80|:443'
If ports aren’t listening or Let’s Encrypt fails, fix these issues and run:
					./bitwarden.sh rebuild
./bitwarden.sh start
Container Management
Here are the key commands for ongoing container management:
					./bitwarden.sh stop       # Stop all containers
./bitwarden.sh restart    # Restart all containers
./bitwarden.sh rebuild    # Rebuild containers (after config changes)
./bitwarden.sh updateself # Update the installer itself
./bitwarden.sh update     # Pull new Bitwarden images and update containers
Note: Commands like renewcert may not exist in 2025; Let’s Encrypt certificates are automatically renewed if you enabled the feature during installation.
Verification Checklist
After running everything, confirm success:
- docker ps –format “table {{.Names}}\t{{.Status}}” shows all containers Up.
- Visit https://vault.yourdomain.com in a browser with no SSL warnings.
- Admin account is created at https://vault.yourdomain.com/admin.
Logs show no repeated Restarting or Exited containers.
Step 5: Post-Installation Hardening & Routine Maintenance
Your Bitwarden instance is live, now let’s secure it, back it up, and keep it updated safely.
1. Secure the Admin Section
Log in to the same admin section where you created your first admin user:
					# Visit:
https://vault.yourdomain.com/admin
Inside the Admin Panel:
- Enable Two-Factor Authentication (2FA)
- Set a strong master password
- Restrict admin access to trusted users only
Reliable Automatic Backups
Bitwarden stores all critical data (including its database) in /opt/bitwarden/bwdata.
Back up the entire directory to ensure full disaster recovery.
Create a dedicated backup folder owned by bitwarden:
					 sudo mkdir -p /opt/bitwarden/backups
sudo chown bitwarden:bitwarden /opt/bitwarden/backups
1. Nightly cron job (run as bitwarden user):
sudo -u bitwarden crontab -e
Add this line to back up at 3 AM and keep only 7 days:
					 0 3 * * * tar -czf /opt/bitwarden/backups/bitwarden-$(date +\%Y-\%m-\%d).tar.gz /opt/bitwarden/bwdata \
    && find /opt/bitwarden/backups -name "bitwarden-*.tar.gz" -mtime +7 -delete
2. Both cron and manual tests use the same escaped date format (\%Y-\%m-\%d).
Manual backup test:
					 sudo -u bitwarden tar -czf /opt/bitwarden/backups/bitwarden-test-$(date +\%Y-\%m-\%d).tar.gz /opt/bitwarden/bwdata
ls -la /opt/bitwarden/backups/bitwarden-test*
Keep a copy of these backups off-server (e.g., cloud storage or another host).
3. Keep Bitwarden Updated (2025-Verified)
As of September 2025, the correct update sequence is:
					sudo -iu bitwarden
cd /opt/bitwarden

./bitwarden.sh updateself
./bitwarden.sh update
./bitwarden.sh start      ensure containers are running after update
updateself refreshes the installer, update pulls new images, and start guarantees everything is back online.
Error-recovery if update fails:
					./bitwarden.sh stop
docker compose logs -f          # check what went wrong
./bitwarden.sh rebuild          # rebuild from current config
./bitwarden.sh start
4. Monitor Container Health
Run as bitwarden user:
					docker ps --format "table {{.Names}}\t{{.Status}}\t{{.Ports}}"
# Also check for frequent restarts:
docker stats --no-stream
Healthy output should resemble:
					NAMES              STATUS           PORTS
bitwarden-web      Up 12 hours     0.0.0.0:80->80/tcp, 443->443/tcp
bitwarden-api      Up 12 hours
bitwarden-identity Up 12 hours
bitwarden-mssql    Up 12 hours
5. Maintain Server & SSL Security
Return to your regular sudo user for OS-level tasks:
					exit   # leave bitwarden user
sudo apt update && sudo apt upgrade -y
sudo ufw status
- Enable unattended security upgrades (Debian/Ubuntu):
					sudo apt install unattended-upgrades -y
     sudo dpkg-reconfigure --priority=low unattended-upgrades
- SSL certificate checks:
					 # Quick connectivity check:
     curl -I https://vault.yourdomain.com

     # Certificate expiration details:
     echo | openssl s_client -servername vault.yourdomain.com \
            -connect vault.yourdomain.com:443 2>/dev/null | openssl x509 -noout -dates
Final Verification Checklist
- 2FA enabled on admin account
- Nightly backups confirmed in /opt/bitwarden/backups
- docker ps shows all containers Up and stable (no constant restarts)
- System packages and Bitwarden images updated
- SSL certificate valid and browser shows no warnings


© 2025 : Virtarix. All Rights Reserved