If you’re using Windows 11 in 2025, there’s no better way to bring Linux into your workflow than with Windows Subsystem for Linux 2 (WSL 2). Over the years, Microsoft has refined WSL into a powerful tool that now includes native systemd support, automatic GPU acceleration for AI and machine learning workloads, seamless Docker and Dev Container integration, and even built-in support for running Linux GUI applications directly within Windows.
With these improvements, you can now run full Linux distributions such as Ubuntu, Debian, or Fedora on your Windows machine without relying on virtual machines or dual-boot setups. The experience feels almost identical to working on a native Linux system, letting developers, researchers, and students code, test, and deploy Linux applications right inside Windows – no restarts or complicated setup needed.
In this updated guide, you’ll learn how to install WSL 2 on Windows 11 using both the quick one-command method and the manual setup method. You’ll also see how to configure and update your Linux distribution for better performance, enable systemd, optimize your setup using the .wslconfig file, and connect your Windows and Linux environments for a smooth workflow. The quick installation usually takes about 10–15 minutes, while the manual setup with full configuration may take around 20–30 minutes.
Prerequisites
Before beginning the installation, verify your system meets these requirements:
- Windows 11 with the latest updates installed through Windows Update
- Hardware virtualization enabled (Intel VT-x or AMD-V) in your BIOS/UEFI settings
- Administrator access to run PowerShell or Command Prompt with elevated privileges
- Stable internet connection for downloading kernel updates and Linux distributions
- At least 8GB of available disk space (20GB+ recommended for comfortable usage)
Quick Verification
To verify your system is ready:
- Press Win + I to open Settings
- Navigate to System > About
- Confirm Windows 11 version is 22000 or higher
- Check that your processor supports virtualization

To verify virtualization is enabled:
- Open Task Manager (Ctrl + Shift + Esc)
- Click the Performance tab
- Select CPU
Check if “Virtualization” shows “Enabled”

If virtualization is disabled, restart your computer and enter BIOS/UEFI settings (usually by pressing F2, F12, Del, or Esc during boot) to enable Intel VT-x or AMD-V.
Quick Installation Method (Recommended)
Microsoft introduced a simplified installation command that automates the entire WSL 2 setup process. This is the recommended method for most users running modern Windows 11 builds.
Single Command Installation
- Open PowerShell as Administrator
- Right-click the Start button
- Select “Windows Terminal (Admin)” or “PowerShell (Admin)”
- Run the installation command:
wsl --install

- What this command does automatically:
- Enables the Windows Subsystem for Linux feature
- Enables the Virtual Machine Platform feature
- Downloads and installs the latest Linux kernel
- Sets WSL 2 as the default version
- Installs Ubuntu (the default distribution)
- Restart your computer when prompted
- After a restart, Ubuntu will launch automatically and prompt you to:
- Create a Linux username (lowercase recommended, no spaces)
- Set a secure password (characters won’t display as you type – this is normal)
Installation is complete! You now have a fully functional Ubuntu environment running on WSL 2.
Installing a Different Distribution
If you prefer a Linux distribution other than Ubuntu:
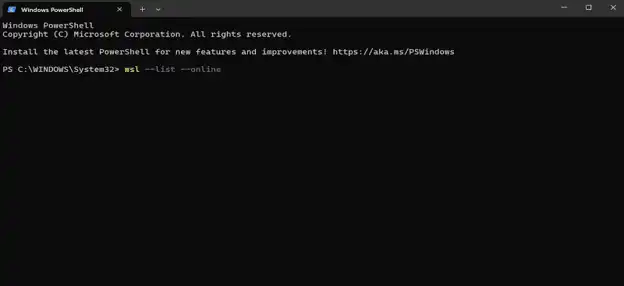
View available distributions:
wsl --list --online
This displays all available Linux distributions, including Ubuntu variants, Debian, Kali Linux, openSUSE, and more.
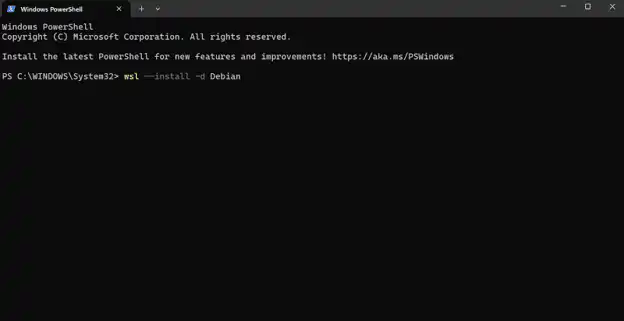
Install your preferred distribution:
wsl --install -d Debian
Replace Debian with any distribution from the list (e.g., Ubuntu-24.04, kali-linux, openSUSE-Leap-15.5).
Verification
After installation, verify everything is working:
wsl --status
You should see output indicating Default Version: 2 and your installed distribution.
wsl --list --verbose
This displays all installed distributions and confirms they’re running WSL version 2.
Manual Installation Method (Alternative)
Use this method if the quick installation fails, when troubleshooting issues, or if you require more granular control over the installation process.
Step 1: Enable Required Windows Features
Open PowerShell as Administrator and execute the following commands without rebooting between them:
dism.exe /online /enable-feature /featurename:Microsoft-Windows-Subsystem-Linux /all /norestart
This command enables the Windows Subsystem for Linux feature, which provides the foundation for running Linux distributions.
dism.exe /online /enable-feature /featurename:VirtualMachinePlatform /all /norestart
This command enables the Virtual Machine Platform, which WSL 2 requires to create its lightweight virtual machine environment.
Now, restart your computer to apply these system-level changes.
Step 2: Install the WSL 2 Linux Kernel Update
After your system restarts, download the latest WSL 2 Linux kernel update package from here. Once the download is complete, run the installer file named wsl_update_x64.msi. Follow the installation wizard using the default settings, and then click “Finish” when the installation completes.
In recent Windows 11 builds, the WSL 2 kernel may already be included. If the installer notifies you that it is already present, you can safely skip this step.
Step 3: Set WSL 2 as Default Version
In an Administrator PowerShell window, execute:
wsl --set-default-version 2
This ensures any Linux distribution you install will automatically use WSL 2 rather than the older WSL 1 architecture.
Verify the change:
wsl --status
The output should display “Default Version: 2.”
Step 4: Install a Linux Distribution
You have two options for installing distributions:
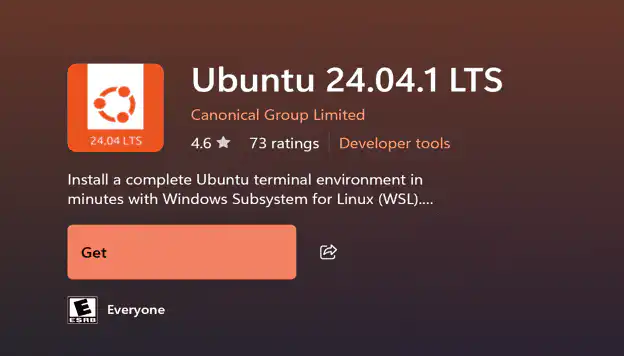
- Microsoft Store (Recommended)
- Open the Microsoft Store application
- Search for your preferred Linux distribution (e.g., “Ubuntu 24.04 LTS”)
- Click “Get” or “Install”
- Wait for the download to complete
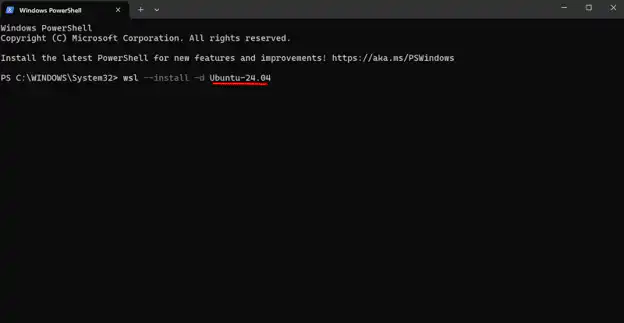
- Command Line
wsl --install -d Ubuntu-24.04
Install Docker Engine
Update the package index and add Docker’s official repository:
Replace Ubuntu-24.04 with any distribution name from wsl –list –online.
Step 5: Launch and Configure Your Distribution
Launch your Linux distribution either from the Start menu or by running the command wsl -d Ubuntu-24.04 in PowerShell or Command Prompt. Then wait for the initialization process to complete – the first launch may take 1–2 minutes.
Once initialized, you’ll be prompted to create your Linux user account. Enter a username (use lowercase letters and avoid spaces) and then set a password. The password field will not display any characters as you type – this is completely normal.
Your Linux password is independent of your Windows password, so make sure to store it securely, as it will be required whenever you use sudo commands. After setup completes, you’ll be greeted with a Linux command prompt, indicating your distribution is ready to use.
Updating and Configuring Your Linux Distribution
Update Linux Packages
Inside your Linux terminal, run the following commands to update your system:
sudo apt update && sudo apt upgrade -y
This updates the package lists and upgrades all installed packages to their latest versions. The initial update may take several minutes to complete.
For a more thorough update:
					sudo apt full-upgrade -y
sudo apt autoremove -y
These commands upgrade all packages (including kernel updates) and remove unnecessary packages
Update WSL Kernel
Return to PowerShell (Administrator) and update the WSL kernel to the latest version:
wsl --update
This fetches the latest WSL kernel releases and components from Microsoft.
Then, cleanly shut down all running WSL instances to apply updates:
wsl --shutdown
Restart your distribution normally after the shutdown completes.
Verify Installation
Confirm WSL 2 is properly installed and configured:
wsl --status
Check your installed distributions and their versions:
wsl --list --verbose
The output should show your distribution running on version 2.
If a distribution shows version 1, convert it to WSL 2:
wsl --set-version Ubuntu-24.04 2
Replace Ubuntu-24.04 with your actual distribution name.
Essential Post-Installation Configuration
Enabling systemd
Systemd is the modern Linux initialization system that many services and applications depend on, including Docker, snapd, and various system services. WSL 2 supports systemd natively, but it requires manual enablement.
To enable systemd:
Open your WSL distribution and edit the WSL configuration file:
sudo nano /etc/wsl.conf
Add the following lines:
					[boot]
systemd=true
Save the file (Ctrl + O, Enter, then Ctrl + X to exit).
Shut down WSL from PowerShell:
wsl --shutdown
Restart your distribution – systemd is now active.
Verify systemd is running:
systemctl list-units --type=service
You should see a list of active services managed by systemd.
If you get an error like:
“System has not been booted with systemd as init system (PID 1). Can’t operate.”
Double-check that:
- /etc/wsl.conf includes systemd=true under [boot]
- You shut down WSL completely using wsl –shutdown
- You restarted your distribution from scratch (not a reopened terminal session)
Optimizing Performance and Resources
Using .wslconfig for Resource Limits
By default, WSL 2 can consume up to 50% of your total RAM or 8GB (whichever is smaller), and use all available CPU cores. For better control over system resources, create a configuration file.
Create the configuration file:
Open PowerShell and create .wslconfig in your Windows user directory:
notepad $env:USERPROFILE\.wslconfig
Add configuration settings (adjust values based on your system):
					[wsl2]
# Limits VM memory (adjust based on your RAM)
memory=4GB

# Sets the VM to use a specific number of processors
processors=2

# Sets swap file size (used when RAM is exhausted)
# Recommended: 25–50% of your memory limit
# Note: Swap is slower than RAM — if used often, increase memory instead
swap=2GB

# Enables nested virtualization (needed for Docker)
nestedVirtualization=true
Save and close the file.
Restart WSL to apply changes:
wsl --shutdown
Recommended settings by system RAM:
- 8GB RAM: memory=3GB, processors=2
- 16GB RAM: memory=6GB, processors=4
- 32GB+ RAM: memory=8GB or more, processors=4–8
Post-Installation Tips
Accessing Files Between Windows and Linux
Access Windows files from Linux:
Your Windows drives are automatically mounted under /mnt/:
					cd /mnt/c/Users/YourUsername/Documents
ls
Access Linux files from Windows:
From Windows File Explorer, navigate to:
\\wsl$\Ubuntu-24.04\home\yourusername
Or simply type \\wsl$ in the address bar to see all distributions.
For best performance, store project files that Linux tools will access frequently (like code repositories) in the Linux filesystem (~/projects) rather than in Windows directories (/mnt/c/). Operations on files in the Linux filesystem are 5-10x faster.
Slow:
/mnt/c/Users/yourusername/projects/
Fast:
~/projects/
Example:
					# Create projects directory in Linux filesystem
mkdir ~/projects
cd ~/projects

# Clone repositories here, not in /mnt/c/
git clone https://github.com/yourrepo.git
This especially matters for:
- Node.js or Python projects
- Git operations
- Compilation tasks
- Docker volumes
Conclusion
You’ve now set up WSL 2 on your Windows 11 system and turned it into a complete Linux workspace. With support for systemd, GPU acceleration, and smooth file sharing between Windows and Linux, you can now work, test, and develop in a Linux environment without leaving Windows.
From here, you can install your favorite tools, set up your projects, or start experimenting with coding, Docker, or other Linux-based workflows. WSL 2 makes it easy to get the best of both systems – simple, fast, and ready for whatever you want to build next.


