
Running your own Bitcoin node gives you complete control over your transactions. You validate every block yourself without relying on anyone else. This guide walks you through setting up a full Bitcoin node on a virtual private server. We’ll cover everything from choosing the right specifications to getting your node up and running.
Before You Begin
Let’s make sure you have everything ready before starting. You’ll need basic command-line experience to follow along comfortably.Grab an SSH client for connecting to your server. Mac and Linux users have Terminal built in. Windows users can use PuTTY or the Windows Subsystem for Linux. Budget it around $20 to $35 per month for a quality server. The exact cost depends on your provider and configuration. The setup itself takes about 30 to 60 minutes. The initial blockchain sync takes much longer, anywhere from 12 to 48 hours, depending on your internet speed and server performance.
Understanding Bitcoin Nodes
A Bitcoin node is a computer that runs the Bitcoin software. It validates transactions and blocks according to the network’s consensus rules. Full nodes download the entire blockchain and verify every transaction that has ever occurred. They don’t trust other nodes to do this work. When you run a full node, you’re strengthening the Bitcoin network. You help new nodes sync and relay valid transactions to other peers.
Why Use a VPS for Your Node
A VPS gives you dedicated resources that stay online constantly. Unlike running a node on your home computer, you get consistent uptime without worrying about power cuts or internet outages. Modern providers offer reliable infrastructure with 99.99% uptime guarantees. Your node stays connected to the network even when your personal devices are offline.
The blockchain requires substantial storage space. The full blockchain is approximately 707 GB now and grows by about 80 to 100 GB annually. Using NVMe SSD storage dramatically improves sync times and overall performance. The fast read and write speeds make a noticeable difference when validating blocks.
Recommended VPS Specifications
Choosing the right server specifications ensures smooth operation. Here’s a quick reference for minimum and recommended specifications:
| Component | Minimum | Recommended |
|---|---|---|
| CPU Cores | 4 cores | 6–8 cores |
| RAM | 8 GB | 16 GB |
| Storage | 1 TB SSD | 2 TB NVMe SSD |
| Bandwidth | 500 Mbps | 1 Gbps unmetered |
| OS | Ubuntu 22.04 LTS | Ubuntu 24.04 LTS |
You need at least 4 virtual CPU cores since Bitcoin Core uses multiple threads for validation and networking tasks. 8 GB of RAM handles the memory requirements comfortably, though 16 GB is recommended if you plan to run additional services like Lightning Network. Storage is critical because you’re downloading the entire blockchain. Get a server with at least 1.5 to 2 TB of NVMe SSD storage to accommodate the current blockchain size and several years of future growth.
For the operating system, Ubuntu 24.04 LTS provides the stability and long-term support you need. It’s widely tested with the software and receives security updates for five years. The latest version of Bitcoin Core is v30.0. This release includes performance improvements and security enhancements over previous versions. Our VPS plans are configured with these exact specifications, including NVMe SSD storage and unmetered bandwidth to handle your node reliably.
Setting Up Bitcoin Node on Ubuntu VPS
Once you have your Linux server ready, you can start the installation process. These steps assume you’re logged into your Ubuntu server via SSH with root access.
Update Your System
Update your system packages to ensure you have the latest security patches:
apt update && apt upgrade -y
This refreshes your package list and upgrades all installed software. The process takes a few minutes, depending on available updates.
Install Bitcoin Core
Download the software directly from the official website for maximum security. This method is more reliable than using third-party repositories.
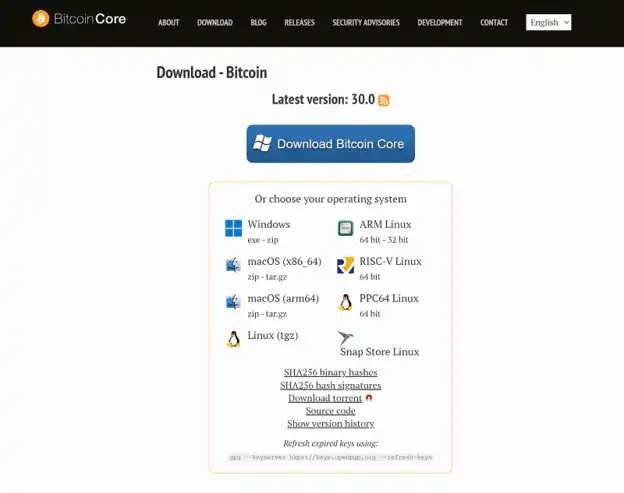
Navigate to the temporary directory:
cd /tmp
Download the Bitcoin Core binary:
wget https://bitcoincore.org/bin/bitcoin-core-30.0/bitcoin-30.0-x86_64-linux-gnu.tar.gz
Download the verification files:
					wget https://bitcoincore.org/bin/bitcoin-core-30.0/SHA256SUMS
wget https://bitcoincore.org/bin/bitcoin-core-30.0/SHA256SUMS.asc
Verify the download integrity:
sha256sum --ignore-missing --check SHA256SUMS
You should see this output:
bitcoin-30.0-x86_64-linux-gnu.tar.gz: OK
This confirms the software hasn’t been tampered with. If you see FAILED or don’t see OK, download the files again before continuing.
Extract the downloaded files:
tar -xzf bitcoin-30.0-x86_64-linux-gnu.tar.gz
Install the binaries on your system:
sudo install -m 0755 -o root -g root -t /usr/local/bin bitcoin-30.0/bin/*
Verify the installation:
bitcoind --version
You should see version information displayed, confirming the software is installed correctly.
Create a Dedicated User
Running Bitcoin Core as root creates serious security risks. Create a dedicated user and group for running the node.
First, create the bitcoin group:
groupadd -r bitcoin
Create the bitcoin user and add it to the bitcoin group:
adduser --disabled-password --gecos "" --ingroup bitcoin bitcoin
This user account isolates Bitcoin Core from other system processes and limits potential damage if something goes wrong. Notice we don’t add this user to the sudo group because it doesn’t need administrative privileges.
Configure Your Node
Switch to the bitcoin user to set up the configuration. You have two main options, depending on whether you want a full node or a pruned node.
Switch to the bitcoin user:
sudo -u bitcoin -i
Create the Bitcoin data directory:
mkdir -p ~/.bitcoin
Open the configuration file in the nano editor:
nano ~/.bitcoin/bitcoin.conf
For a Full Node
Use this configuration if you have 1TB or more of storage and want to store the complete blockchain.
Here’s what these settings do. The daemon setting runs Bitcoin Core in the background. Setting prune to 0 stores the complete blockchain with no pruning. The txindex option enables transaction indexing so you can query any transaction by ID. The RPC settings allow you to control your node via the command line. The network settings allow other nodes to connect to yours.
Add these settings to your bitcoin.conf file:
					daemon=1
prune=0
txindex=1
rpcuser=bitcoinrpc
rpcpassword=CHANGE_THIS_TO_STRONG_PASSWORD
rpcallowip=127.0.0.1
rpcport=8332
listen=1
server=1
maxconnections=125
Replace CHANGE_THIS_TO_STRONG_PASSWORD with a strong, unique password that combines letters, numbers, and special characters.
Save the file by pressing Ctrl+X, then Y, then Enter.
For a Pruned Node
Use this configuration if you want to save disk space. Pruning keeps only recent blocks while still validating everything.
Here’s what these settings do. The daemon setting runs Bitcoin Core in the background. The prune value of 5500 keeps approximately 5 to 10 GB of recent block data, depending on which blocks are retained. This provides better support to the network than the minimum 550 MB while still saving significant disk space. You cannot use txindex with pruning enabled, so choose one approach or the other.
Add these settings to your bitcoin.conf file:
					daemon=1
prune=5500
rpcuser=bitcoinrpc
rpcpassword=CHANGE_THIS_TO_STRONG_PASSWORD
rpcallowip=127.0.0.1
rpcport=8332
listen=1
server=1
Replace CHANGE_THIS_TO_STRONG_PASSWORD with a strong, unique password that combines letters, numbers, and special characters.
Save the file by pressing Ctrl+X, then Y, then Enter.
Create System Service
Exit back to your admin user:
exit
Create a systemd service file so Bitcoin Core starts automatically on boot. Open the service file:
sudo nano /etc/systemd/system/bitcoind.service
Copy and paste these contents into the file:
					[Unit]
Description=Bitcoin daemon
After=network.target

[Service]
User=bitcoin
Group=bitcoin
Type=forking
ExecStart=/usr/local/bin/bitcoind -daemon -conf=/home/bitcoin/.bitcoin/bitcoin.conf -pid=/home/bitcoin/.bitcoin/bitcoind.pid
ExecStop=/usr/local/bin/bitcoin-cli -conf=/home/bitcoin/.bitcoin/bitcoin.conf stop
Restart=on-failure

[Install]
WantedBy=multi-user.target
Save the file and exit the editor. Reload systemd to recognize the new service:
sudo systemctl daemon-reload
Enable the service to start automatically on boot:
sudo systemctl enable bitcoind
Start the service immediately:
sudo systemctl start bitcoind
Your node is now running and will automatically restart if it crashes or when your server reboots.
Checking Node Health
Your node needs time to download and verify the blockchain. This initial block download takes anywhere from several hours to a few days, depending on your connection speed.
Switch back to the bitcoin user to check your progress:
sudo -u bitcoin -i
Check Network Connectivity
Verify your node is connecting to other peers on the network:
bitcoin-cli getnetworkinfo
Look for the connections field, which shows how many peers you’re connected to. Your node automatically maintains 8 to 10 outbound connections. Once you open port 8333 in the next section, you can accept up to 125 inbound connections from other nodes. A healthy, fully connected node typically shows 30 to 125 total connections.
The networkactive field should show true, indicating your node is actively participating in the network.
Monitor Blockchain Sync
Check how much of the blockchain you’ve downloaded and verified:
bitcoin-cli getblockchaininfo
The verification progress field shows sync progress as a decimal from 0.0 to 1.0, where 0.75 equals 75% complete, and 1.0 equals fully synced.
When this number reaches 1.0, your node is fully synced. The initial block download field shows true during the sync and switches to false when complete.
You can run this command periodically to track your progress during the initial download.
View Node Status
Check if Bitcoin Core is running properly:
systemctl status bitcoind
Look for active and running in the output. You can also check the debug log for detailed information:
tail -n 100 ~/.bitcoin/debug.log
This shows the last 100 lines, including connection attempts and blocked downloads.
Opening Required Ports
Bitcoin Core uses port 8333 for peer-to-peer connections. Other nodes connect to yours through this port.
Configure your firewall to allow incoming connections on this port:
ufw allow 8333/tcp
Enable the firewall:
ufw enable
Without this step, your node can only make outbound connections. Allowing incoming connections helps the network by letting new nodes sync from yours.
Basic Security Hardening
Your node is now running, but consider these additional security measures to protect your server. For a comprehensive guide to server security, check out our VPS security checklist.
SSH Security
Change your SSH port from the default 22 and disable direct root login.
First, open the new port in your firewall to avoid getting locked out:
ufw allow 2222/tcp
Now open the SSH configuration file:
sudo nano /etc/ssh/sshd_config
Look for these two lines in the file. You can search using Ctrl+W in nano.
First, find the Port line. Look for Port 22 or #Port 22 and change it to Port 2222. You can choose any number between 1024 and 65535.
Second, find the PermitRootLogin line. Look for PermitRootLogin yes or #PermitRootLogin yes and change it to PermitRootLogin no.
Save the file by pressing Ctrl+X, then Y, then Enter.
Restart SSH to apply the changes:
sudo systemctl restart sshd
Before disconnecting, open a new terminal window and test the new SSH port to ensure you can still connect. Connect using ssh -p 2222 username@your-server-ip.
Keep Software Updated
Check for Bitcoin Core updates every few months by visiting the releases page for the latest versions.
Install security updates regularly on your system:
sudo apt update && sudo apt upgrade -y
Regular updates protect against known vulnerabilities and keep your node secure.
Commonly Used Extensions
Once your node is running, you can extend its functionality with additional software. These tools build on top of Bitcoin Core to add new capabilities.
BTCPay Server
BTCPay Server is a self-hosted payment processor that merchants use to accept Bitcoin payments directly. It connects to your Bitcoin node and monitors the blockchain for incoming payments without any intermediaries. The software eliminates payment processing fees. You receive Bitcoin directly to your wallet with no third party involved.
Setting up BTCPay Server requires your node to have txindex enabled. It provides a web interface where you can create invoices, track payments, and manage your Bitcoin commerce operations.
Lightning Network
The Lightning Network is a layer two solution that enables fast micropayments with minimal fees. It opens payment channels between users where unlimited transactions can occur off-chain. Running a Lightning node requires Bitcoin Core as its backend. The most popular implementation is LND, currently at v0.20-beta. Check the releases page for the latest stable version.
Lightning dramatically increases Bitcoin’s transaction capacity. Payments settle instantly and cost fractions of a cent. Your node can route payments for others and earn small routing fees in the process. Setting up Lightning involves opening channels with other nodes by locking Bitcoin in multisig addresses. These channels allow instant payments without broadcasting every transaction to the blockchain.
Lightning Terminal
Lightning Terminal provides a web-based interface for managing your Lightning node. Instead of using command-line tools, you get a visual dashboard for all operations.
You can view your channels, monitor liquidity across different paths, and manage your node’s settings through your browser. The interface shows channel balances, pending payments, and routing statistics in real time.
Ordinals and Inscriptions
The Ordinals protocol lets you inscribe data onto individual satoshis. Each satoshi becomes uniquely identifiable and can carry content like images, text, or other data. Running an Ordinals-aware node requires txindex to be enabled in your configuration. This allows you to track specific satoshis and their inscriptions across transactions.
Common Issues and Solutions
Here are solutions to problems you might encounter during setup or operation. For more detailed troubleshooting, see our guide on common server issues.
Initial Sync is Very Slow
Your node downloads 707+ GB of data. On a slower connection, this can take several days. This is normal.
Check your progress periodically:
bitcoin-cli getblockchaininfo
Look at the verification progress field to see how far along you are. The sync will complete eventually, just be patient.
Cannot Allocate Memory Error
Your server needs at least 8 GB of RAM. If you have less, you’ll need to upgrade your VPS plan with more RAM. You can also try adding swap space, though this significantly slows performance.
Node Not Connecting to Peers
Check your firewall settings:
sudo ufw status
Ensure you see 8333/tcp ALLOW Anywhere in the output. If not, repeat the firewall configuration steps from earlier.
Disk Space Running Out
The blockchain grows continuously. If nearing capacity, either upgrade your storage or switch to a pruned configuration. Remember that pruning disables transaction indexing.
Final Thoughts
Congratulations on setting up your Bitcoin node. You now have a fully operational system that validates transactions independently and contributes to the network’s decentralization. Your node provides the foundation for exploring Lightning Network, BTCPay Server, and other Bitcoin applications as your journey continues.