Deutsch
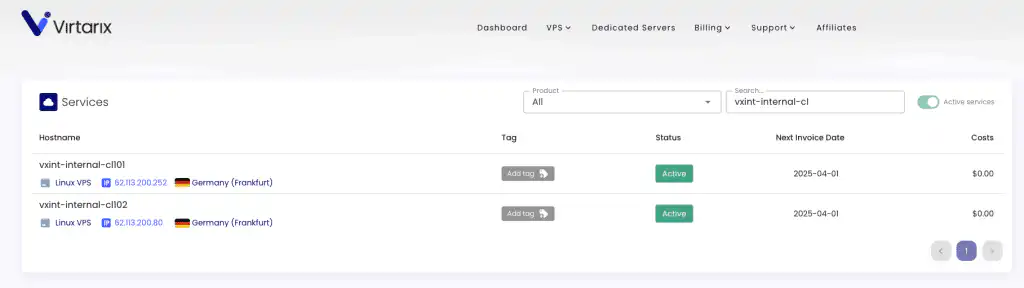
In this article, we will be creating an internal network between vxint-internal-cl101 and vxint-internal-cl102
The internal network service is location dependent. Meaning servers in Dallaswill not be able to connect to an internal network located in Frankfurt or any other region. Visa-versa.
Here we have the two servers we will be configuring:
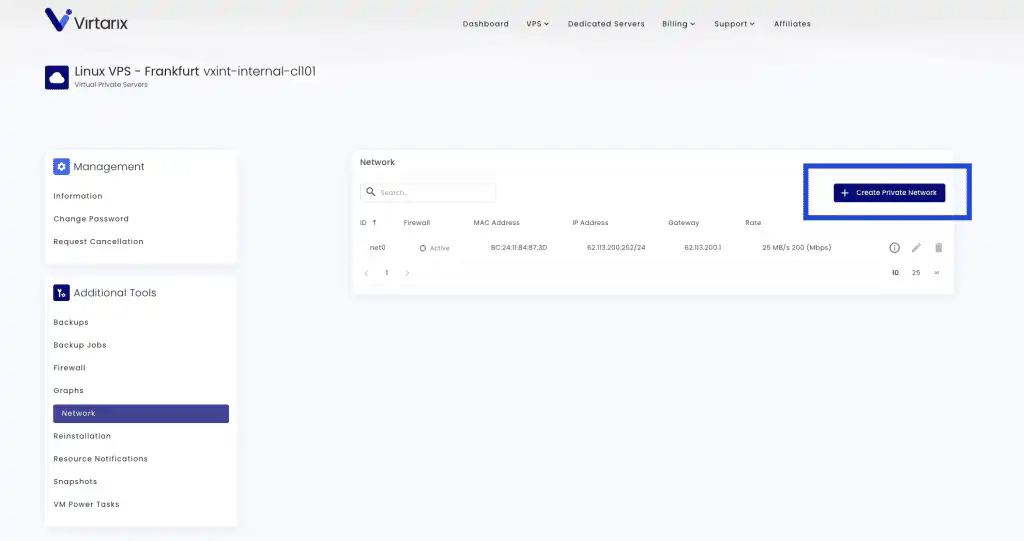
Creating a VXLAN Network
Each server can act as a “master” of the internal network. Meaning on vxintinternal-cl101 , I can create aVXLAN interface and add vxint-internal-cl102 to the VXLAN.
I can then navigate to vxint-internal-cl102 , create another VXLAN and add vxint-internal-cl101 to this new network.
We will configure it so that vxint-internal-cl101 is the “master” of this single VXLAN.
Regarding the reboot:
While you don’t have to reboot the VM at the time of network creation, any configurations to the new NIC will be overwritten after the first reboot since creating the NIC. So it’s best to reboot the VM now and then configure the NIC, so the configuration is persistent.
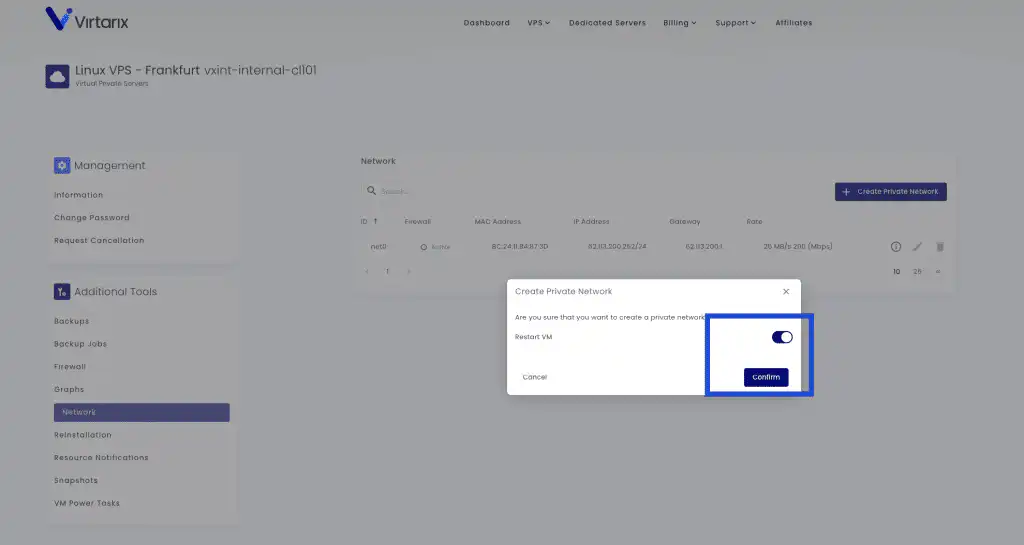
After clicking Confirm, our network gets created:
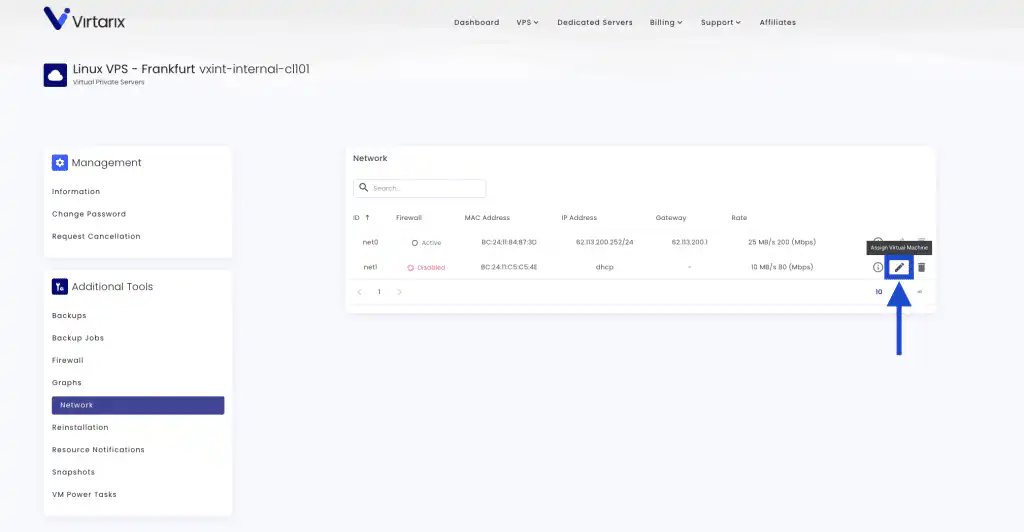
Adding a VM to the Network
Now we need to “add” our second VM to this network:
Important Note: There is a known bug regarding the Reboot VM option. When ADDING a VM to the existing network, the reboot task reboots the “master” VM of the network. Meaning in this example, vxint-internal-cl101 gets rebooted again, which is not what we want.

After selecting vxint-internal-cl102 and disabling the Reboot VM option, we click Confirm.
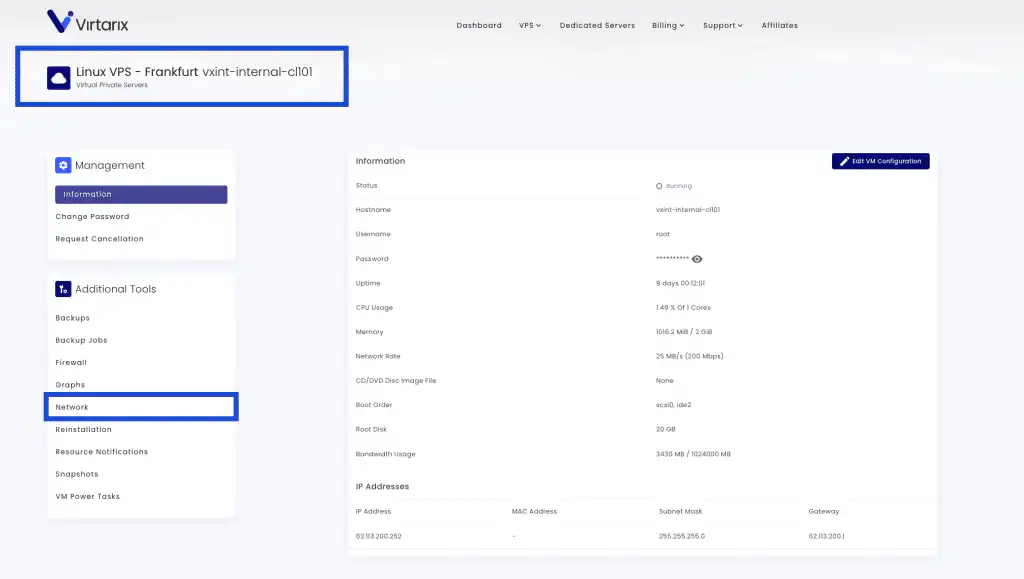
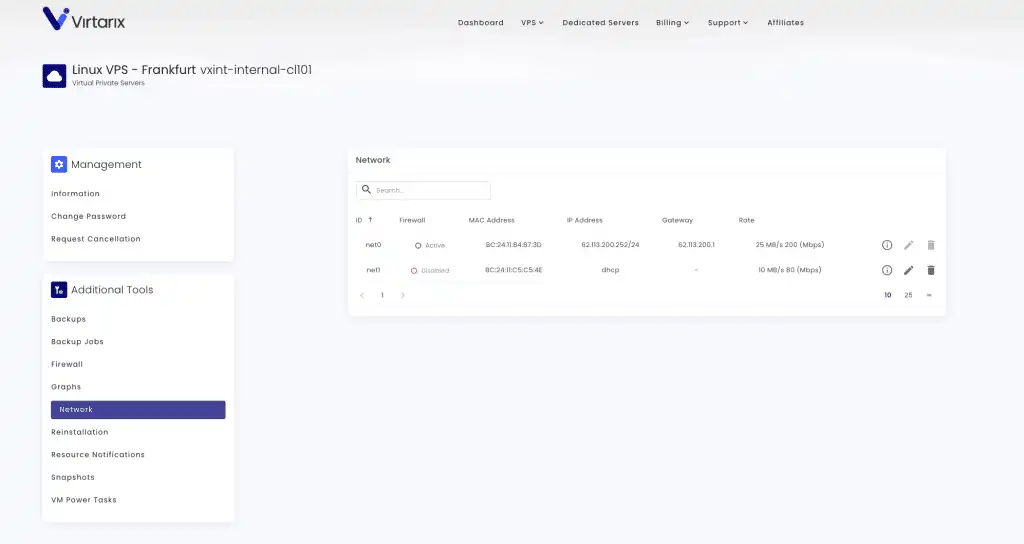
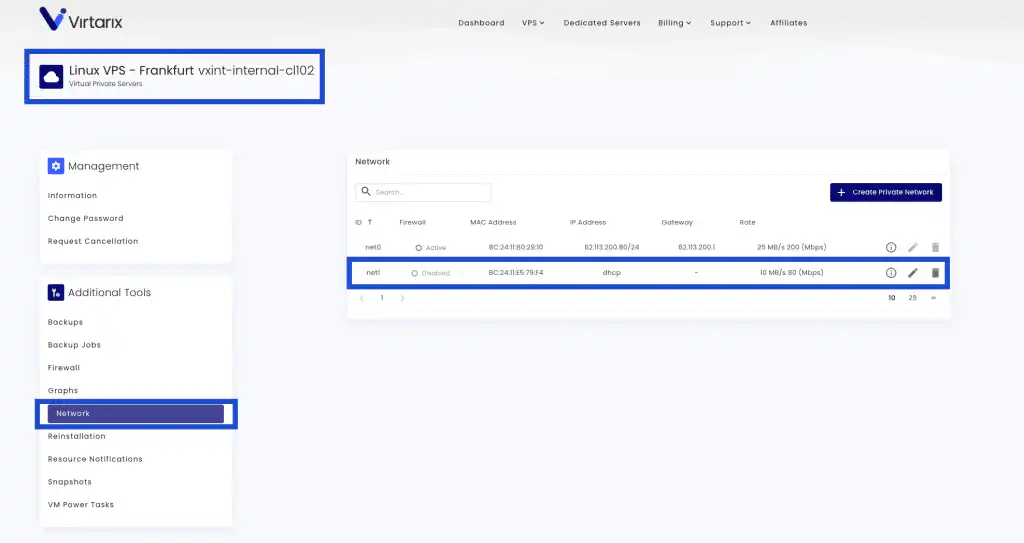
If we navigate to the product page for the VM we just added and go to the Network tab, we will see the new network has been added.
Restarting and Configuring the Network
We should now issue a shutdown + start for the VM:


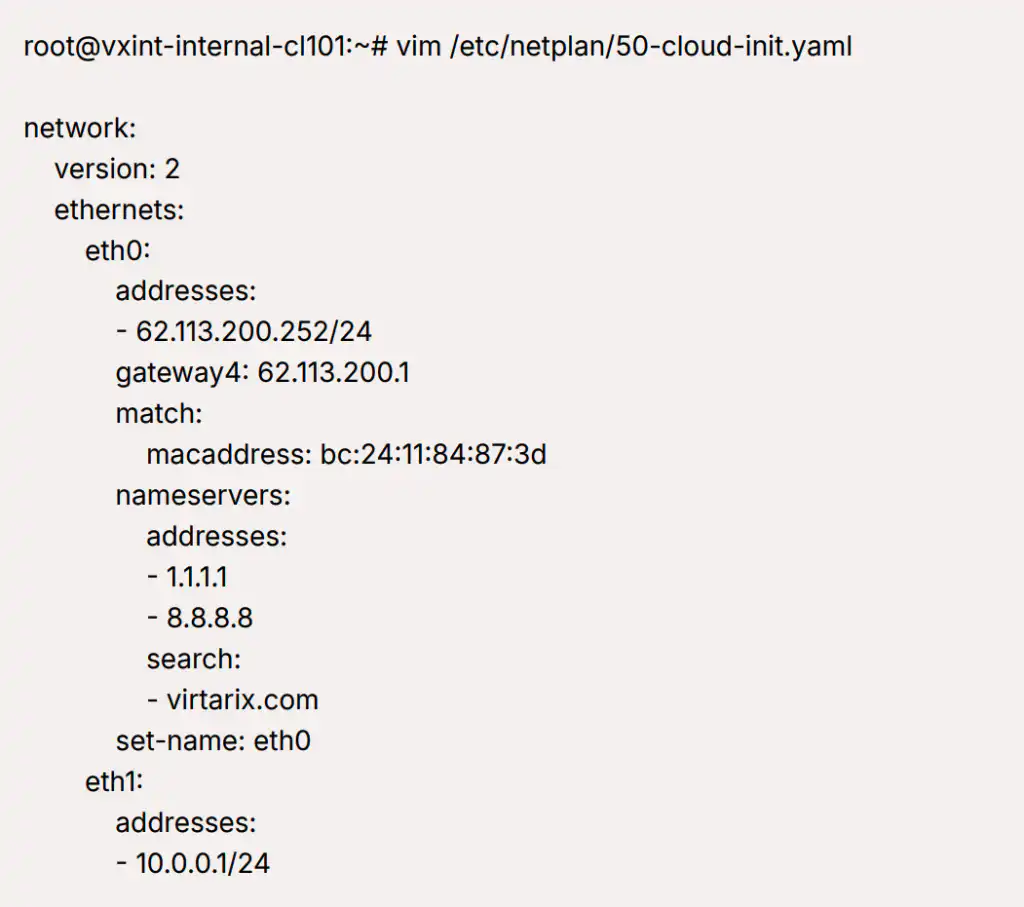
From here, we will connect to the VMs and configure their internal network. You are free to use whatever IP range and CIDR. Specific network configuration is dependent on the OS.
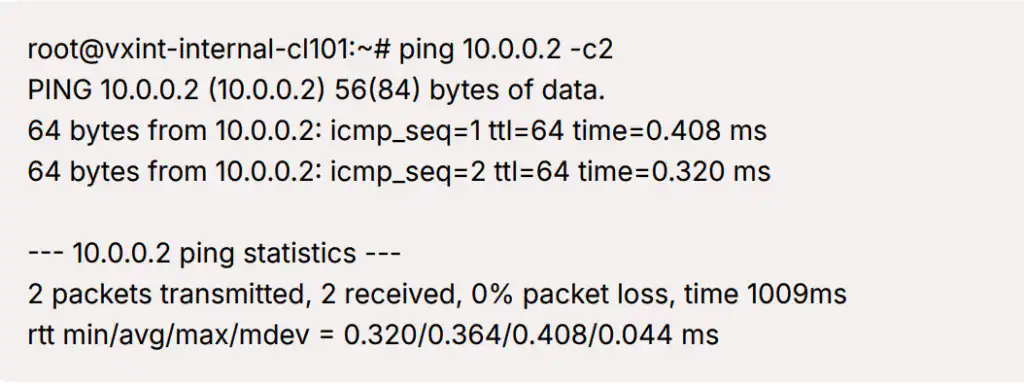
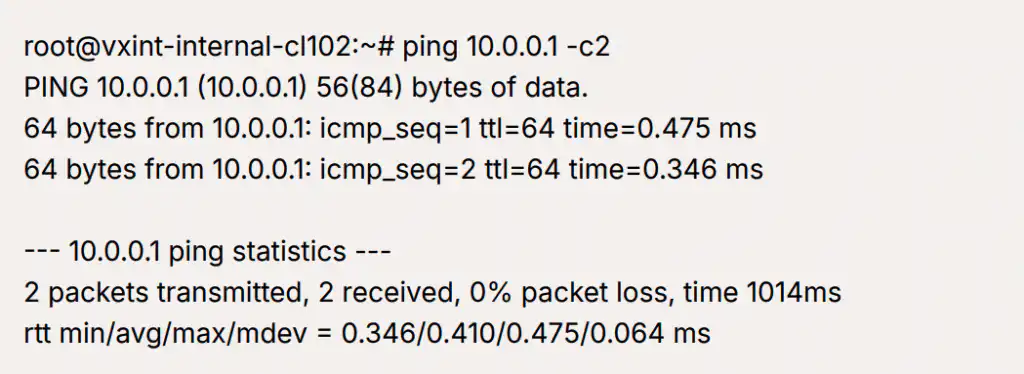
Testing Connectivity
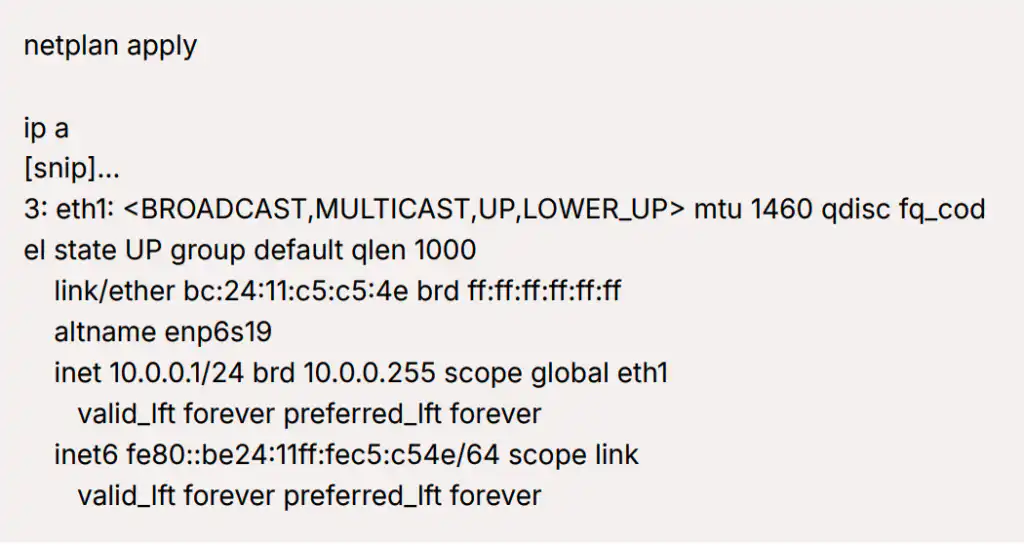
We do the same on vxint-internal-cl102 using the ip 10.0.0.2/24
Let’s try ping each other: