 Deutsch

This guide provides a step-by-step process for changing the Remote Desktop Protocol (RDP) port on Windows Server versions 2016, 2019, and 2022. Follow these instructions carefully to ensure a smooth transition to a new RDP port configuration, while also setting up necessary firewall rules.
Step 1: open the registry editor
To begin changing the RDP port, access the Registry Editor by typing regedit into the Windows search bar, which will open the Registry Editor.
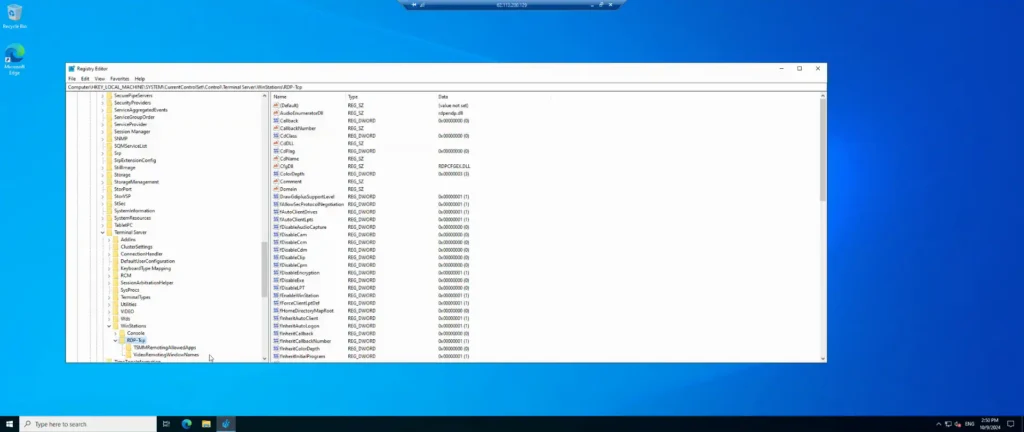
Step 2: navigate to the RDP TCP settings
Select the Registry Editor. Navigate to the RDP TCP port settings through the Registry Editor by accessing the HKEY_LOCAL_MACHINE directory.

Step 3: access the system directory
Within HKEY_LOCAL_MACHINE, proceed to the System directory. Navigate to CurrentControlSet, then access the Control folder. Within Control, locate the TerminalServer directory.
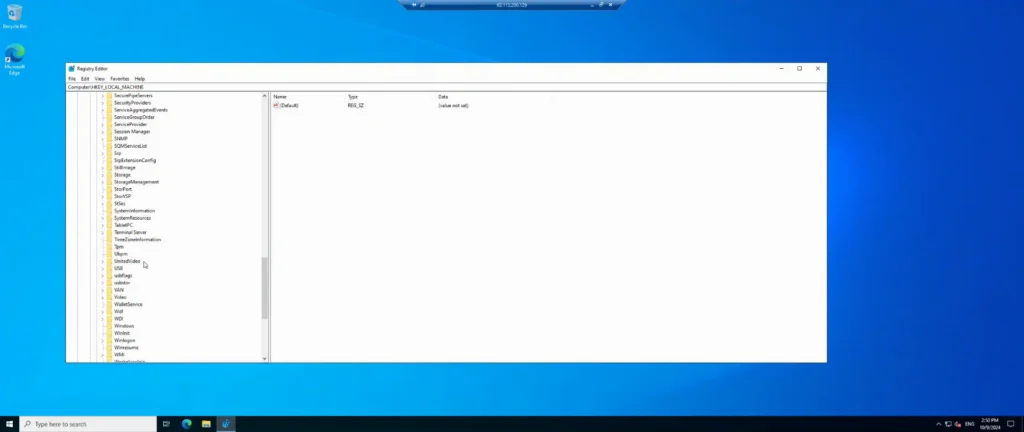
Step 4: locate the terminal server directory
Locate and select TerminalServer within the Control directory.
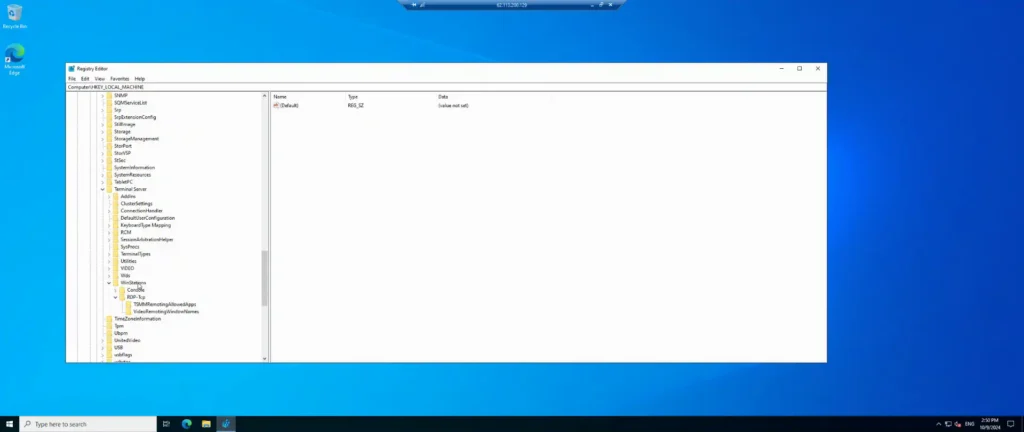
Step 5: open the RDP TCP settings
From TerminalServer, go to WnStations, and then select RDP-TCP. Identify the file labeled PortNumber. Right-click on PortNumber, select MODIFY.
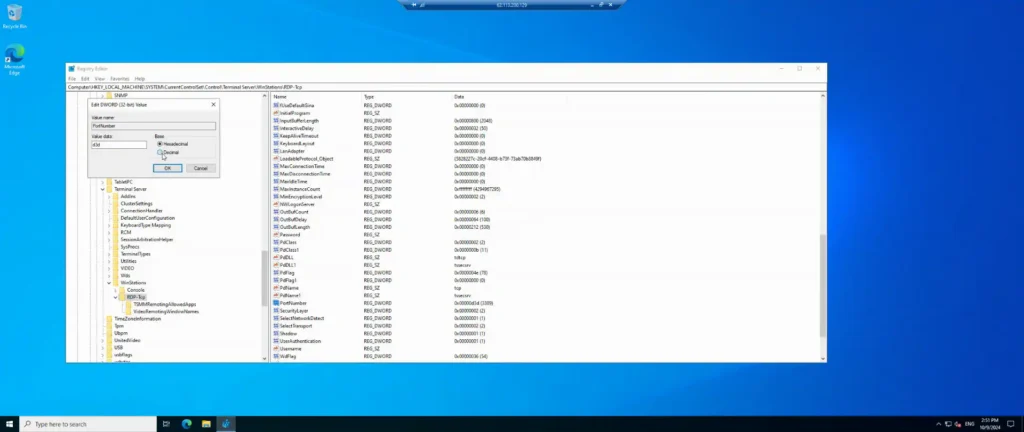
Step 6: modify the RDP port number
Choose the DECIMAL option and input the new port number. Once entered, confirm by clicking OK. If WINDOWS FIREWALL is enabled, proceed to open WINDOWS FIREWALL.
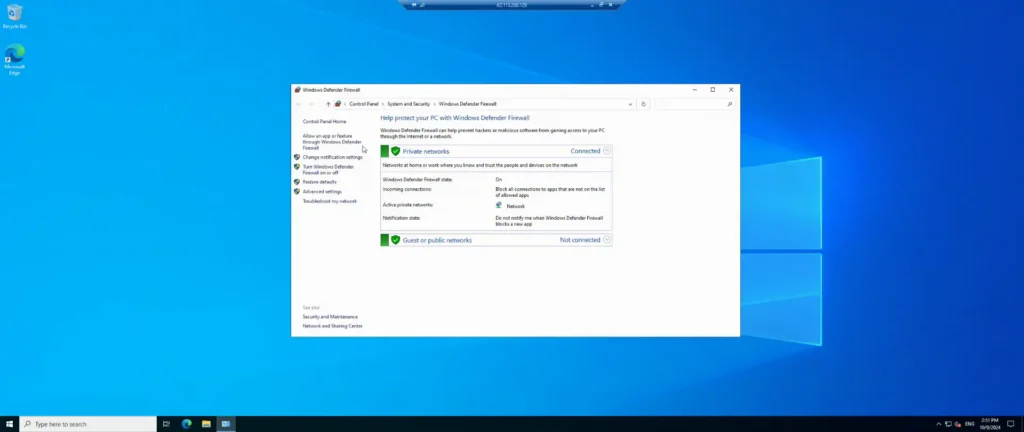
Step 7: open Windows firewall advanced settings
Within WINDOWS FIREWALL, navigate to ADVANCED SETTINGS, then proceed to INBOUND RULES. Here, create a new rule rather than searching for the PORT NUMBER.

Step 8: create a new inbound rule for the new port
To create a new rule, click NEW RULE, select PORT, and then click NEXT.
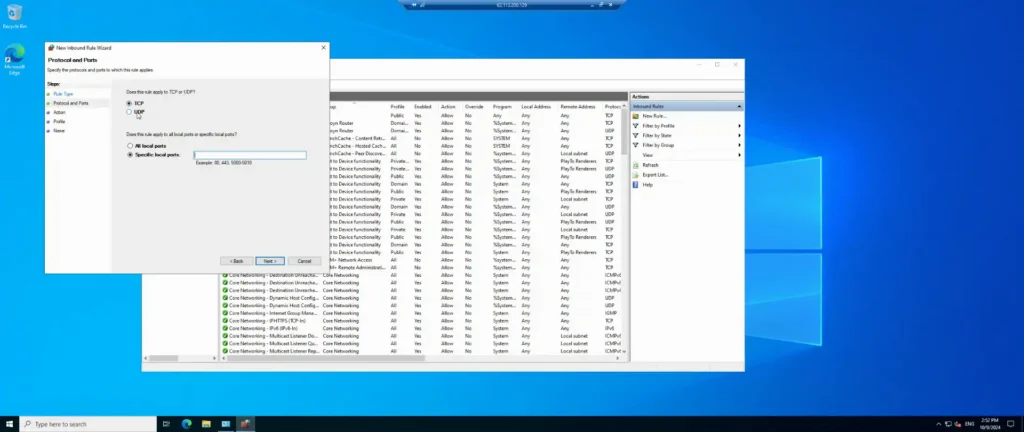
Step 9: specify the new TCP port
Opt for TCP and enter the new port number in SPECIFIC LOCAL PORTS. Click NEXT and choose to allow the connection.
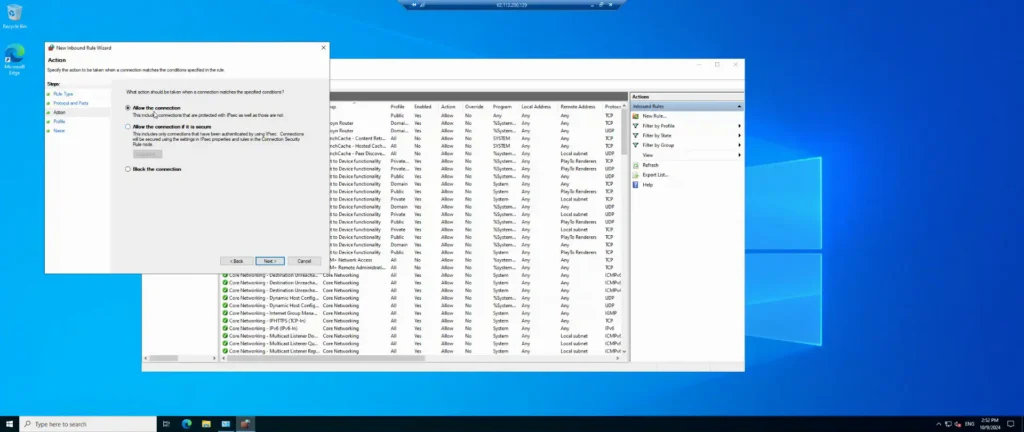
Step 10: allow the connection
Select ALLOW THE CONNECTION, click NEXT. In the profile section, maintain the default settings and click NEXT again.
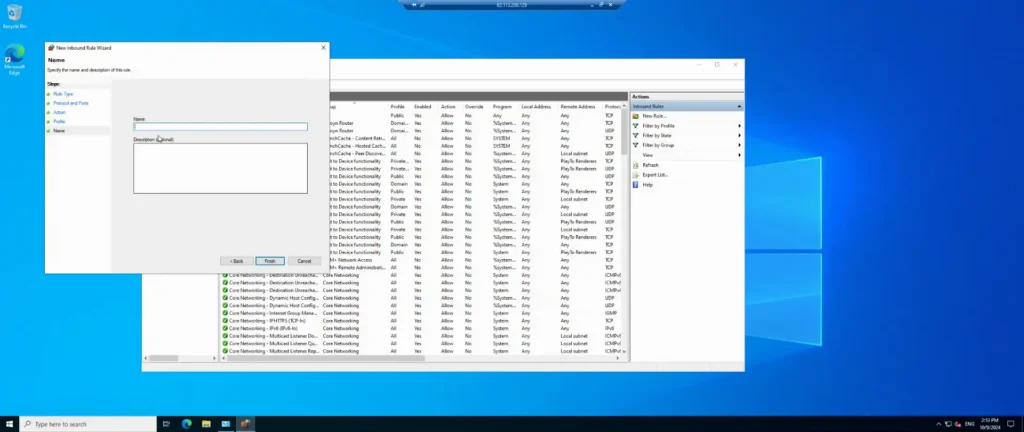
Step 11: name and finish the firewall rule
Name this rule and then click FINISH.

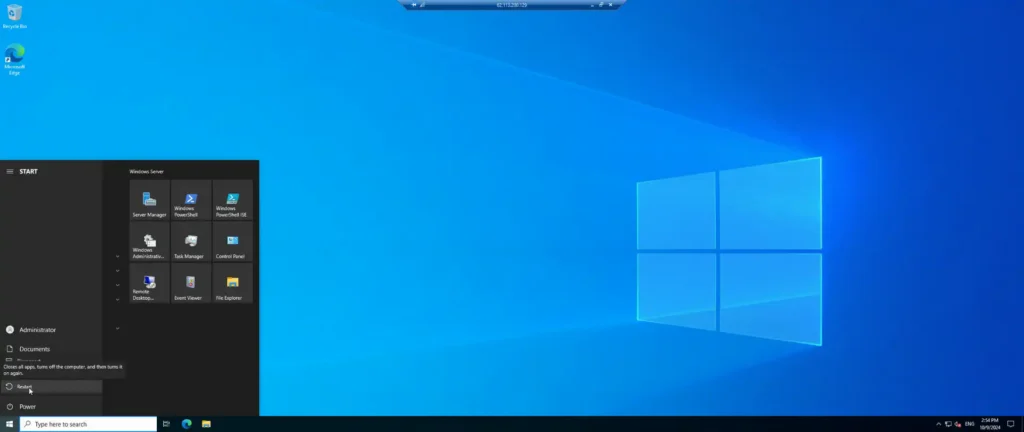
Step 12: reboot the server
To complete the process, reboot the server. Click START, then select the restart icon and choose RESTART.
Notes
The steps for each file in the directory path to get to RDP TCP can be condensed into a single step as such:
HKEY_LOCAL_MACHINE\System\CurrentControlSet\Control\Terminal Server\WinStations\RDP-TCP
Harden the server before launch.
Frequently asked questions
What port does RDP use?
RDP (Remote Desktop Protocol) typically uses TCP port 3389 by default. This port facilitates remote desktop connections between computers over a network. For enhanced security, you can change this port or restrict access to it via firewalls or VPNs.
Why should I change the default RDP port?
Changing the default Remote Desktop Protocol (RDP) port helps improve security by reducing the chances of automated attacks and port scans. Many malicious actors specifically target port 3389, so by changing it to a non-standard port, you make your server less visible and harder for attackers to identify as running RDP services.
What port should I choose for RDP?
While there isn’t a single ‘best’ port for RDP, you should choose a port that is not commonly used by other services. Avoid well-known ports like 80, 443, or 22. For example, you could select a number between 1024 and 65535 that isn't already in use by your system. After changing the port, ensure your firewall rules are updated to allow traffic through the new port.
How do I connect to the server after changing the RDP port?
Once the RDP port is changed, you’ll need to specify the new port number when connecting to the server. In the Remote Desktop Connection client, enter the IP address or hostname of the server followed by a colon and the new port number. For example, if the new port is 3340, you would connect using the format:
192.168.0.1:3340


