How to Set Up a VXLAN Internal Network on Your VPS - Virtarix Blog

How to Set Up a VXLAN Internal Network on Your VPS

February 16, 2026 · Blog / Technical Guides

In this article, we will be creating an internal network between vxint-internal-cl101 and vxint-internal-cl102.

The internal network service is location-dependent. This means servers in Dallas will not be able to connect to an internal network located in Frankfurt or any other region. Vice versa.

Here we have the two servers we will be configuring:
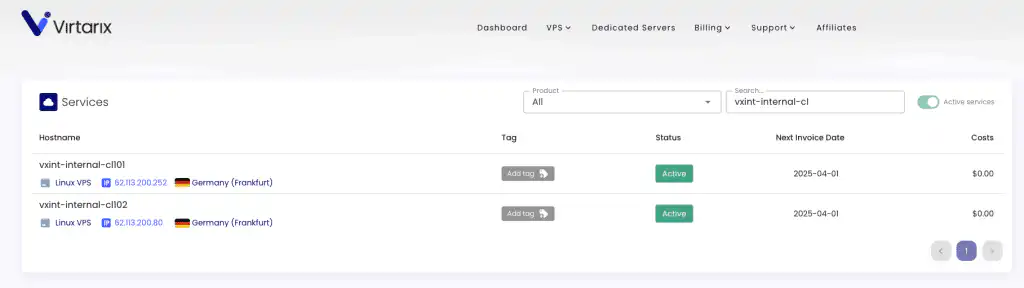
Virtarix services dashboard listing two Frankfurt VPS instances used in the VXLAN example

Creating a VXLAN network

Each server can act as a "master" of the internal network. This means on vxint-internal-cl101, I can create a VXLAN interface and add vxint-internal-cl102 to the VXLAN.

I can then navigate to vxint-internal-cl102, create another VXLAN and add vxint-internal-cl101 to this new network.

We will configure it so that vxint-internal-cl101 is the "master" of this single VXLAN.
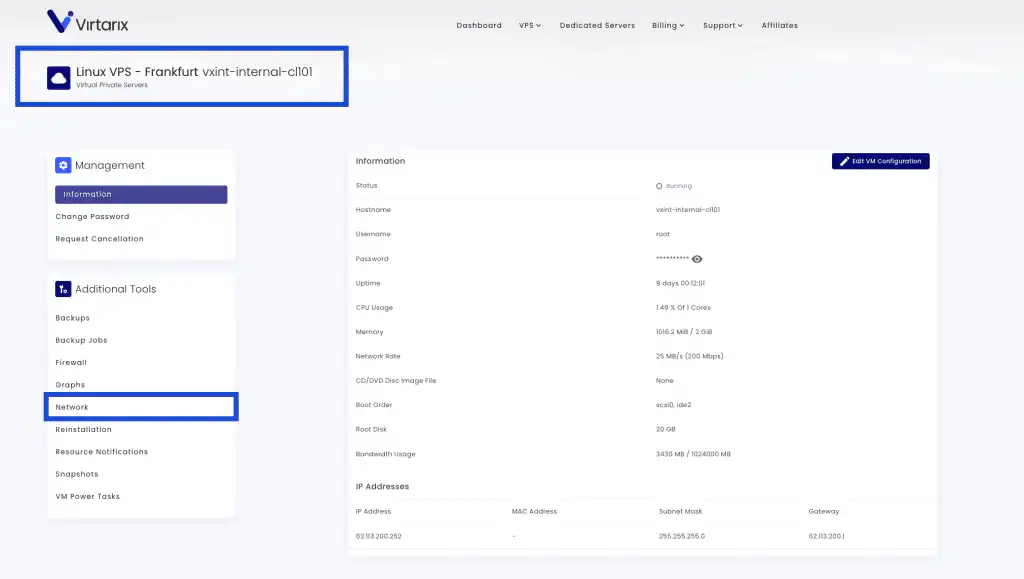
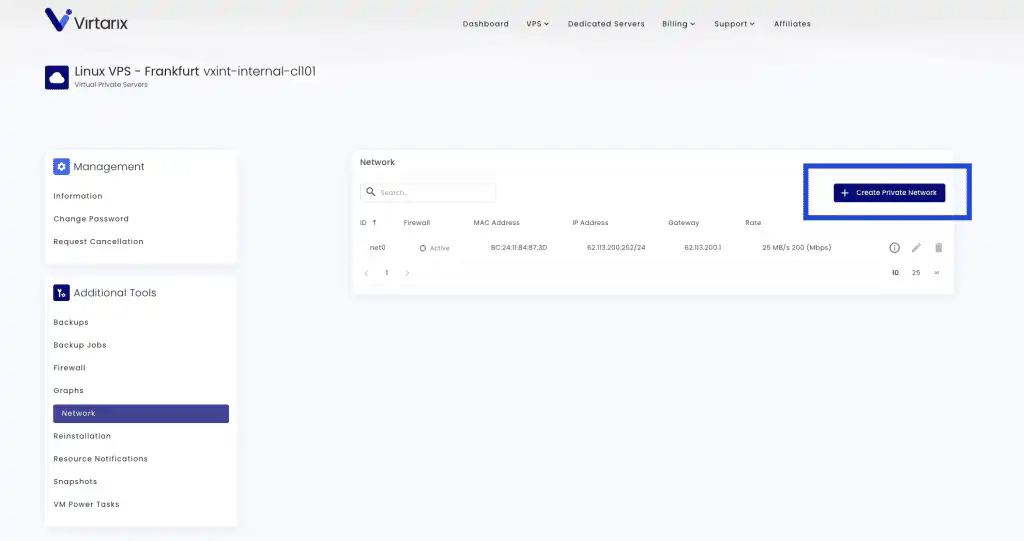
Virtarix Linux VPS page with the Network navigation item highlighted

Virtarix Network tab with the Create Private Network button highlighted

Regarding the reboot:

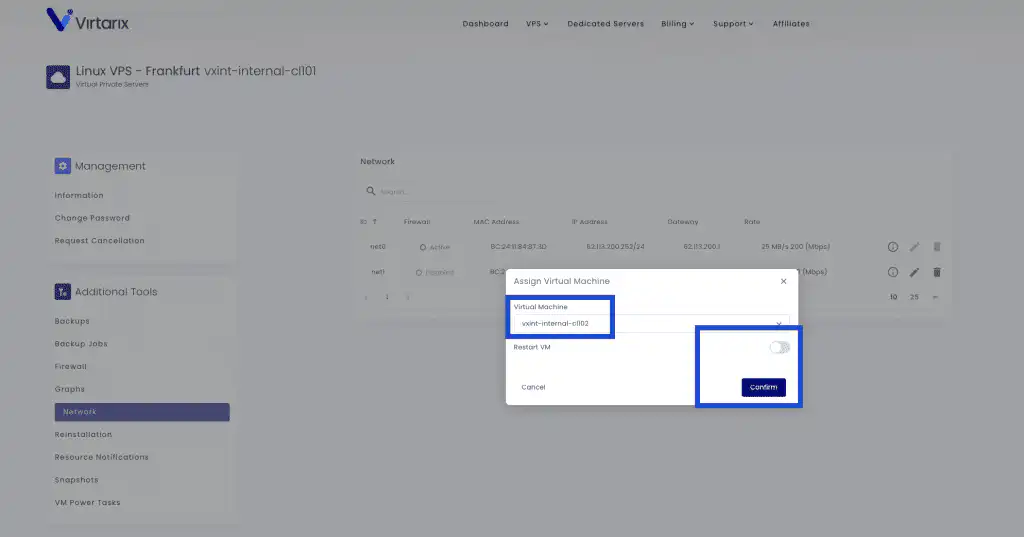
While you don't have to reboot the VM at the time of network creation, any configurations to the new NIC will be overwritten after the first reboot since creating the NIC. So it's best to reboot the VM now and then configure the NIC, so the configuration is persistent.
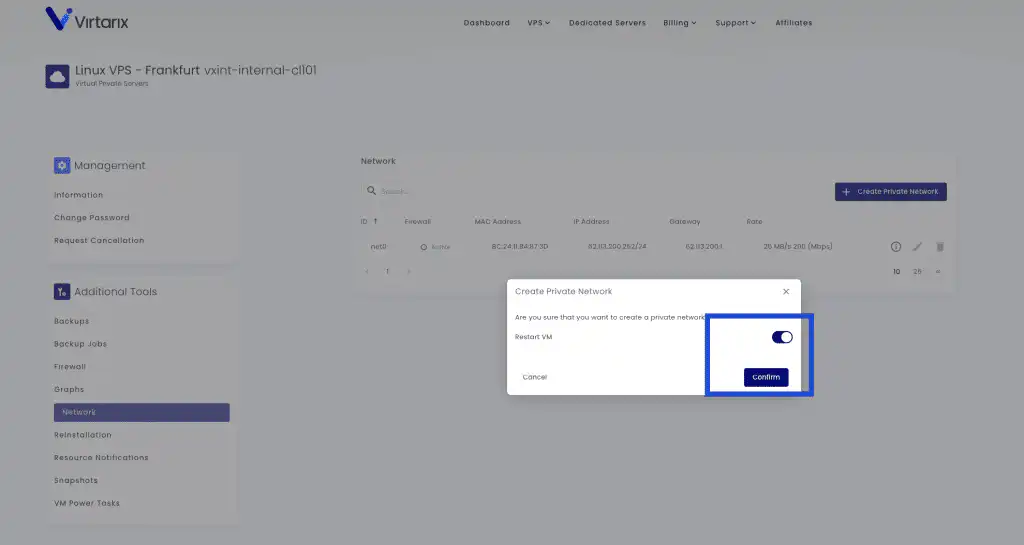
Create Private Network confirmation with the Restart VM toggle and Confirm button highlighted

After clicking Confirm, our network gets created:
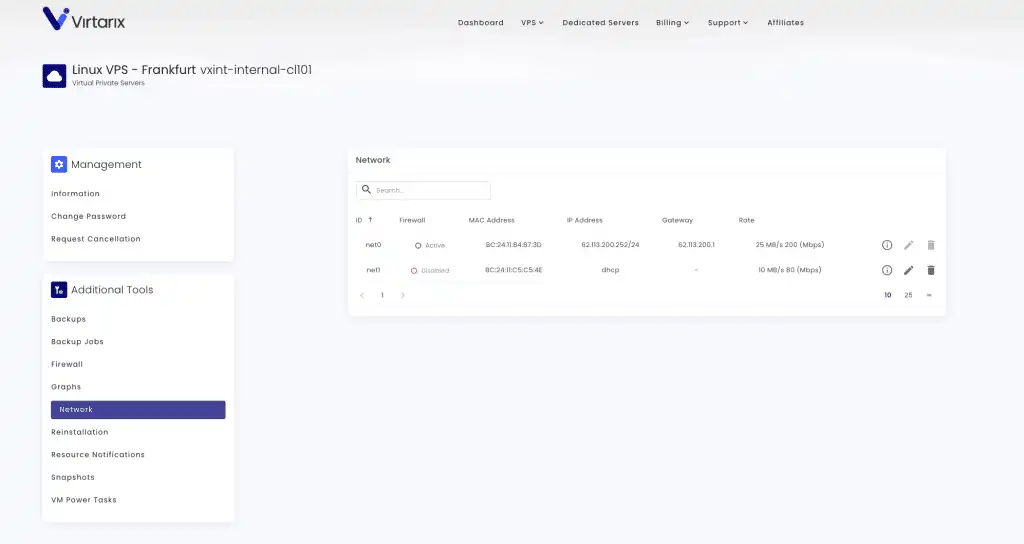
Virtarix Network tab showing the new net1 interface

Adding a VM to the network

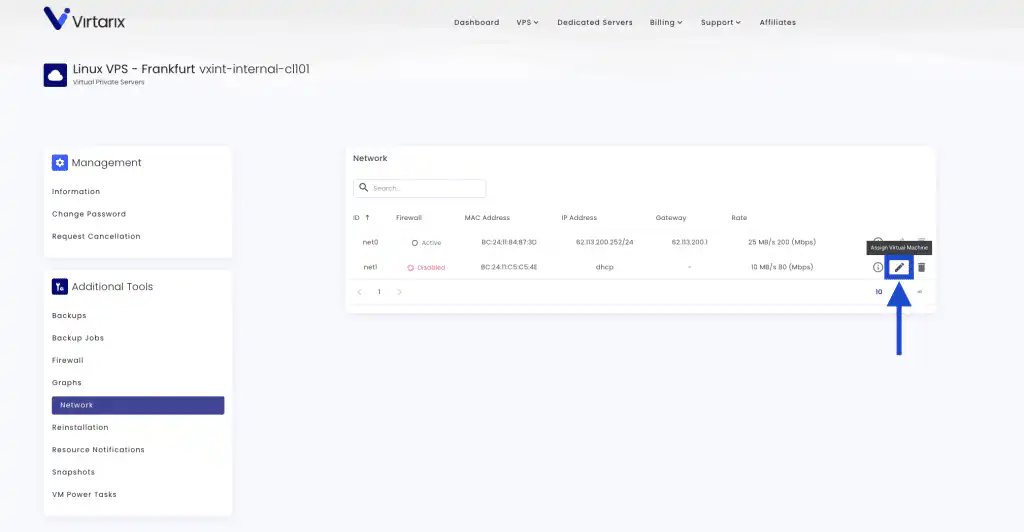
Now we need to “add” our second VM to this network:

Virtarix Network tab with the control to assign a virtual machine highlighted

Important note: There is a known bug regarding the Reboot VM option. When adding a VM to the existing network, the reboot task reboots the “master” VM of the network. This means in this example, vxint-internal-cl101 gets rebooted again, which is not what we want.

Assign Virtual Machine dialog with vxint-internal-cl102 selected and Restart VM disabled

After selecting vxint-internal-cl102 and disabling the Reboot VM option, we click Confirm.

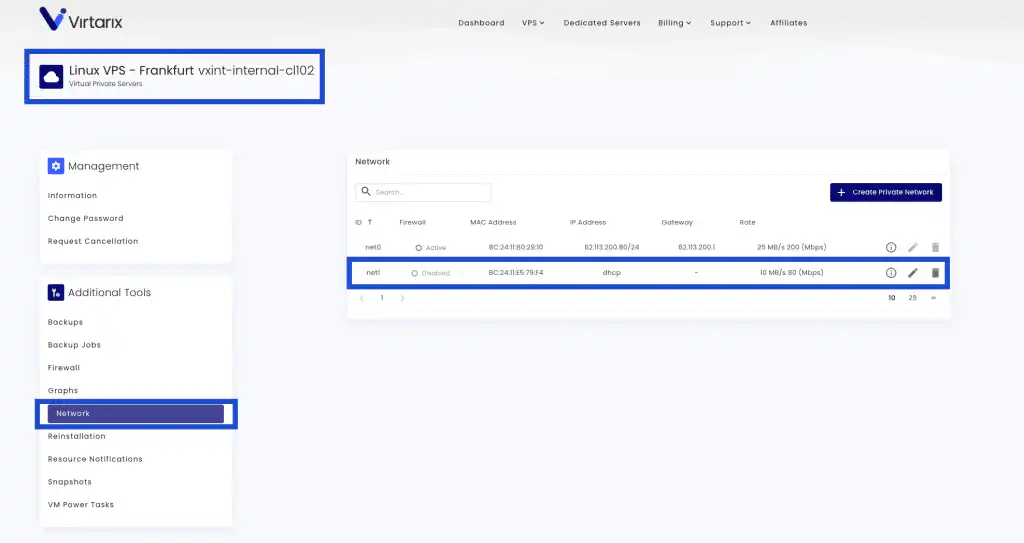
If we navigate to the product page for the VM we just added and go to the Network tab, we will see the new network has been added.

Second Virtarix VM Network tab showing the assigned net1 interface

Restarting and configuring the network

We should now issue a shutdown + start for the VM:

Virtarix VM power controls with Shutdown Server highlighted

Virtarix VM power controls with Start Server highlighted

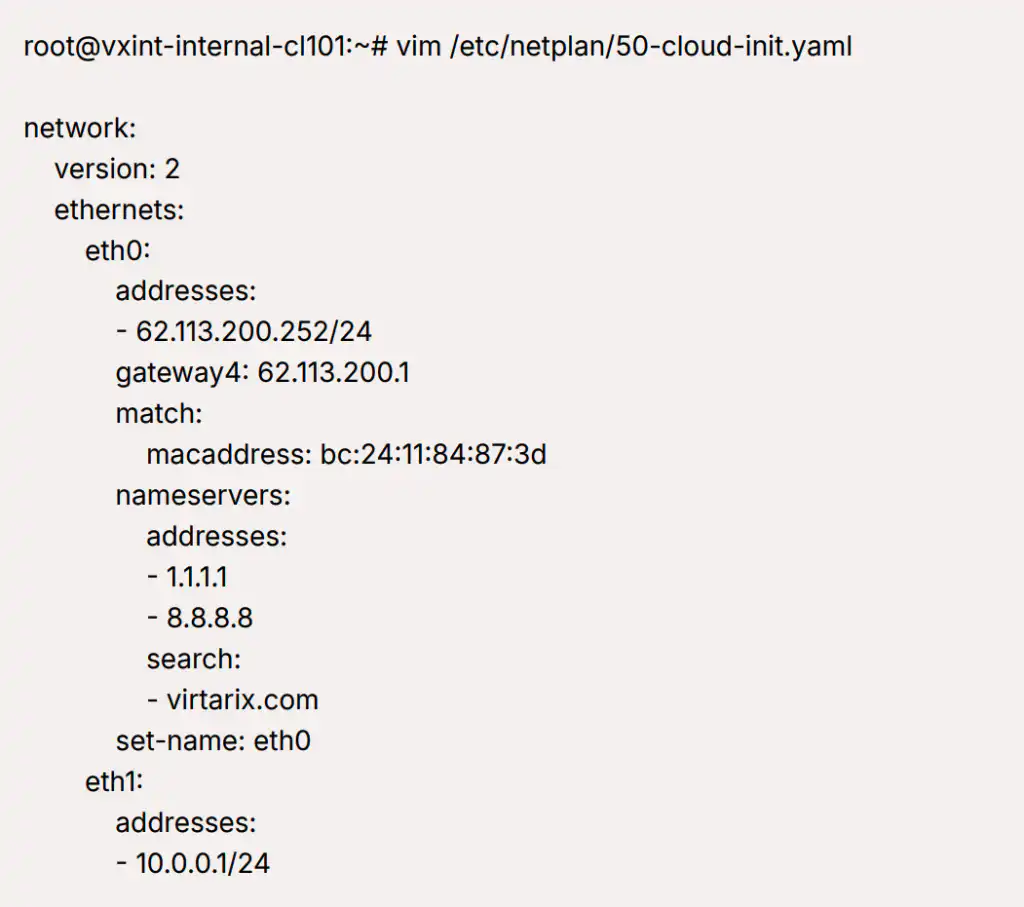
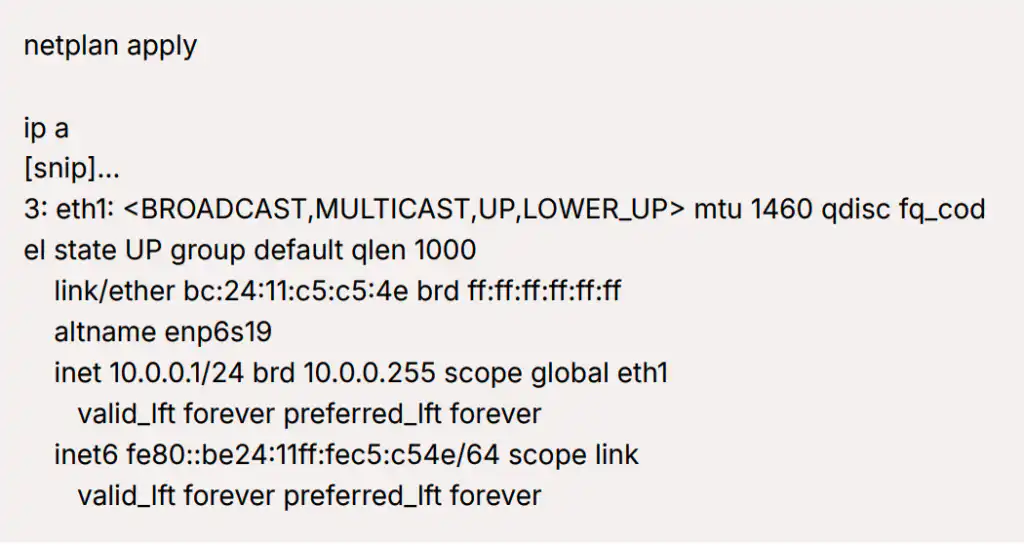
From here, we will connect to the VMs and configure their internal network. You are free to use whatever IP range and CIDR. Specific network configuration is dependent on the OS.

Netplan configuration assigning public eth0 and private 10.0.0.1/24 eth1 addresses

Terminal output confirming private eth1 address 10.0.0.1/24 after applying Netplan

Testing connectivity

We do the same on vxint-internal-cl102 using the IP 10.0.0.2/24.

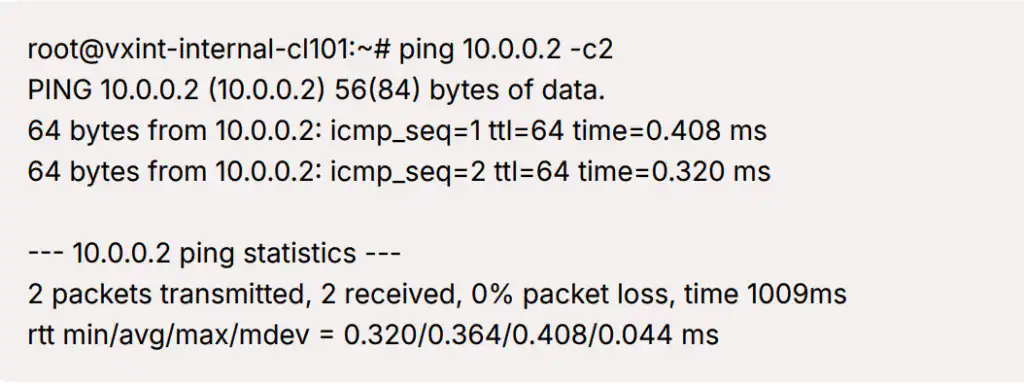
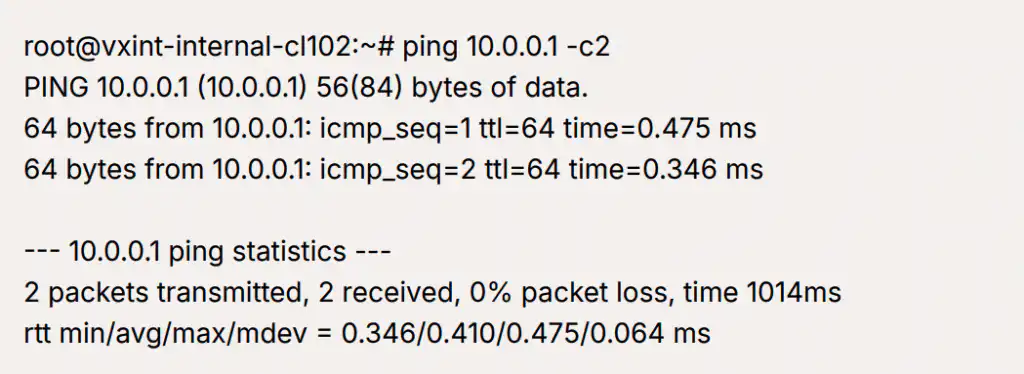
Let's try pinging each other:

Successful ping from the first VXLAN host to private address 10.0.0.2

Successful ping from the second VXLAN host to private address 10.0.0.1

Peter French
About the Author Peter Frenchis the Managing Director at Virtarix, with over 17 years in the tech industry. He has co-founded a cloud storage business, led strategy at a global cloud computing leader, and driven market growth in cybersecurity and data protection.